
Still quarantine 🚧 time and i’m experimenting with another mobile app 📲that needs images to be hosted online 🌍 In this post we’ll walk you through the steps to host your images using Amazon S3 service. Many times we’ re asking the same question can we afford to buy disk space online to host our images. The good news is that Amazon S3 is dead simple and very cheap. Check out my post Host Images on Amazon S3 Cheap In 5 Minutes.
Learn Host Images on Amazon S3 Cheap In 5 Minutes
So how big is 1GB? Well on average you could store
- 18,874 Word Documents
- 3,146 PDFs
- 614 Photos
- 230 Songs
AWS’s S3 service costs about $0.06 per GB of storage per month.
You can check the AWS Simple Monthly calculator
What does that mean?
That means as a customer you can use the S3 service for 1 year for 1GB and actually the cost is $0.72 !! and there is more 😉
💥Correction if you are new to AWS then the first year it is free and it gives you 5GB which is awesome to play around and check it yourself. 💥
For more information on data usage, refer to AWS’s free tier guide.
Done with the cost estimation, let’s head over to set up.
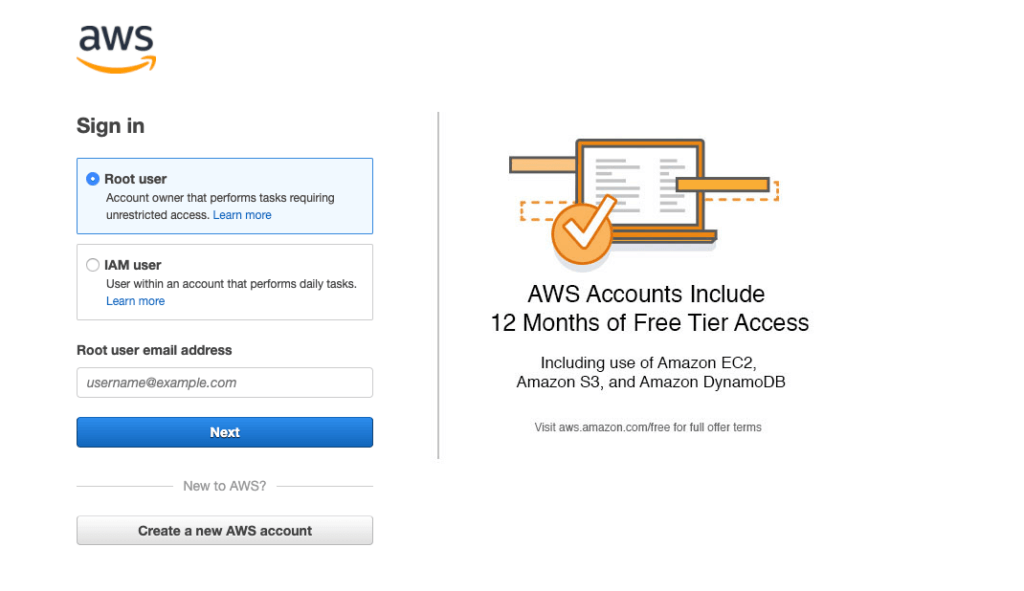
Step 1: Create an AWS Account
Go to https://aws.amazon.com and setup a new account. You should only need a credit card and a phone so that Amazon can call to verify you are real. 🙃(as most of the services)
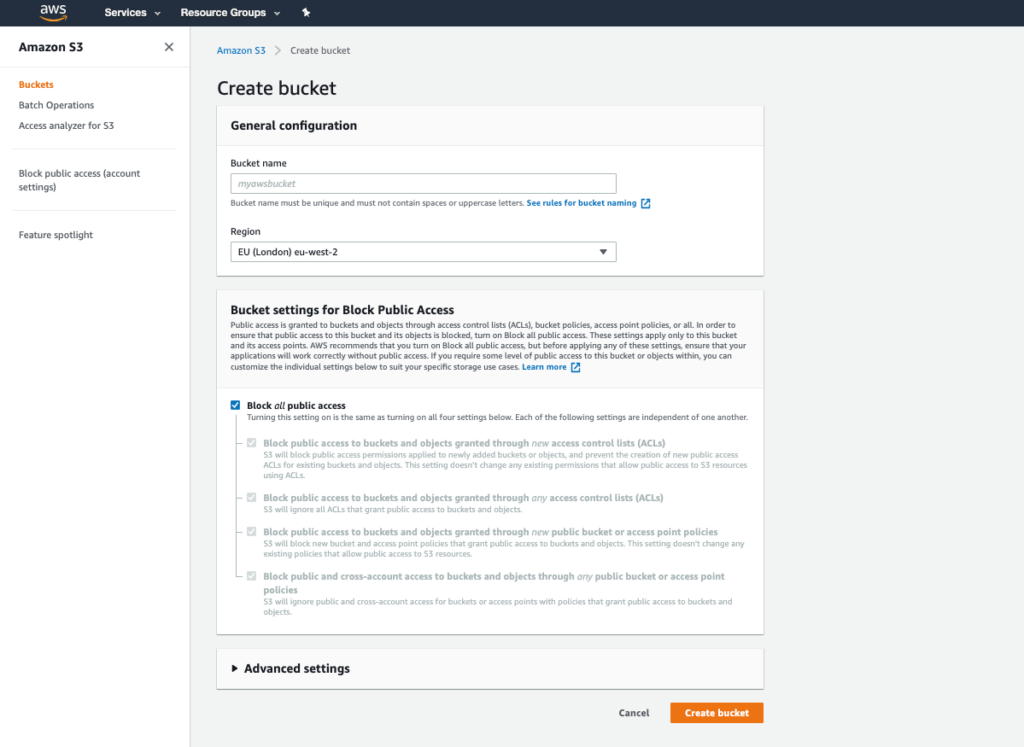
Step 2: Create an S3 Bucket
Once your account is setup and verified, we need to create a bucket. Think of a bucket as a folder on your computer so your can store your files. The only limitation of a bucket is that you must have a unique name across all of AWS. Typically we suggest your business name – media. (for example: mybusinessname-media)
1. Once logged in and verified in AWS, click the Services dropdown in the top left and Select Amazon S3
2. Click Create Bucket, enter the name, and select Region: EU London
Step 3: Upload your files into the bucket
Once created, click on the bucket name in the list on the left and then click Upload on the next screen
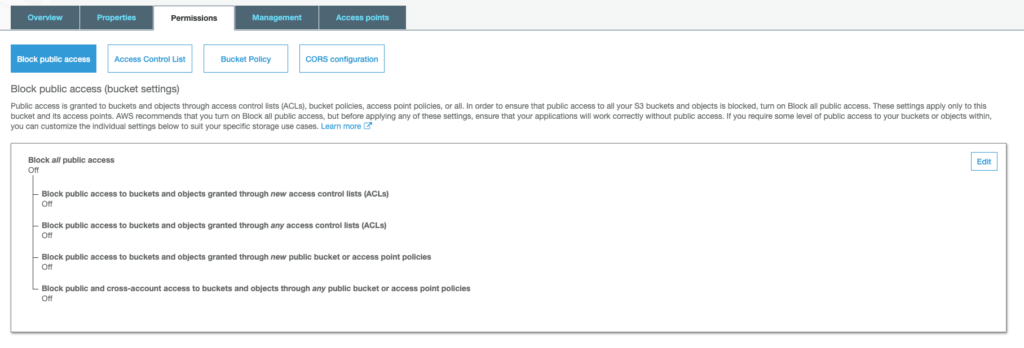
Step 4: Make the Bucket Public So we Can grab the images
After you upload all files, the last step is to make the bucket public so we can get the images from it.
Set Block all public access Off
Go to the object URL to verify that your image’s permission was set correctly. If you get an Access Denied error that means you haven’t set the permissions correctly.
That’s it for now.
If you liked this article, then please subscribe to my YouTube Channel for video tutorials.